
The following is the step by step installation of
the “Eicon Diva Pro 2.0 PCI ISDN Card”. After
inserting or uninstalling the card completely you will have to
reinstall the drivers, on boot the hardware will be found but if for
any reason you cancel this there are other options available, below
are the options, including installing from reboot.
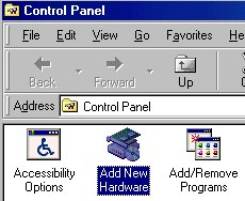
Firstly from Control Panel you could double click
on add new hardware.
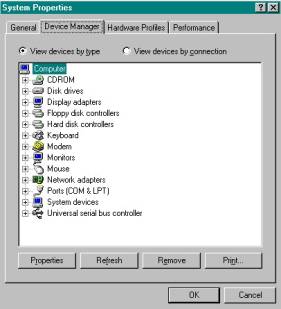
Or from device manager
you could click on refresh.
Or on booting up new hardware will be found and
you can install from there.

Whatever way you choose you will end up with the
Hardware Wizard. As Follows:
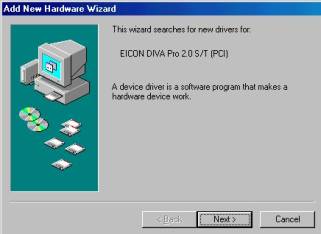
The Plug and Play device has been recognized by
windows, now click next, then select Search for best driver and click
next again to go to next menu
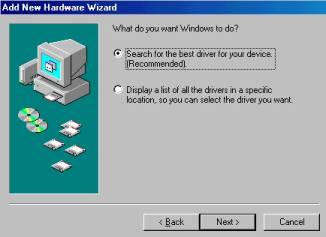
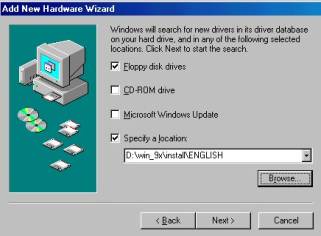
3) The following menu will appear, on this
occasion selecting CD-Rom will not install the driver so you have to
use “Specify a Location” and browse onto the CD to where
the drivers are located, which on this occasion is
D:\win_9x\install\ENGLISH, (where D is the CD-Rom).
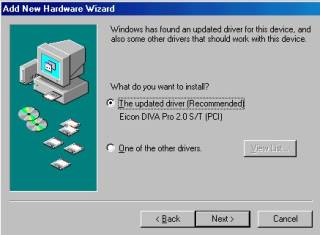
Once you have location hit next and the system
will pick up the updated driver, which is “Eicon Diva Pro 2.0
s/t (PCI)”, accept this and install the driver.
Windows will now confirm it is ready to install
the device. Click Next.

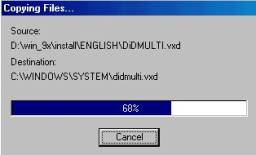
Now watch as the driver files install onto the
PC.
Once Finished the
following screen shall appear confirming that the driver is
installed, hit Finish to continue.
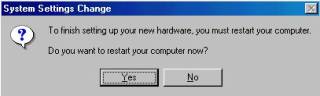
As with 90% of drivers
you will now be prompted to reboot the computer. Click yes to
finalize the install.
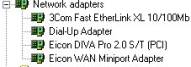
After reboot you now check the install, in this
occasion the card will be installed under Network Adapters in device
manager as per below (2 Installs for Card)
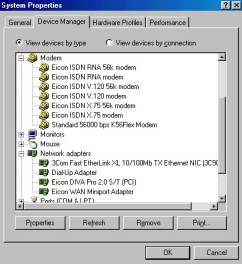
On this rare occasion of installing a driver you
will also find several different modem install done by the card under
modem properties, (see below picture).
Installation complete and fully successful, all
you need now is an ISP to connect to.
THE END
