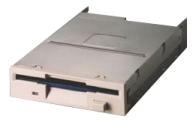
The Floppy Drive : Remove
the floppy drive from it's packaging. ( Floppy drive pictured below) You
will see on the the front of computer a panel or a slot that is exactly the
right size for your floppy drive (Panel) or for a slot, the right size for a
floppy disk. Behind this there will be a cage which the floppy drive will
happily slip into. But before you do this check for a metal plate blocking
it's exit point. Remove this plate using your hand or pliers by simply
twisting it back and forth. If there is more than one panel, select the
uppermost one. Also if you are using the panel remove the Plastic Blanking
plate at the front of the system.
Now making sure the eject button
will be to the bottom right (when system is upright) and insert the floppy
drive. (insert from the front if it's a panel exit or from the back if it's
a slot) Now using 4 screws from your plate screw the floppy drive in
tight ( use two each side). Use a floppy disk to test it is ejecting and
seated correctly.
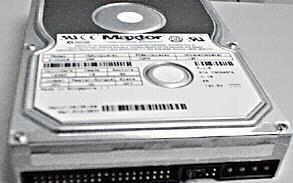
The Hard Drive :
Remove the Hard Drive from it's packaging (DVD drive pictured below).
Check that it is jumpered for master on the back. You can usually see
how to do this from a sticker on the drive, else refer to any documentation
that came with the drive. (They usually are master by default) Now
take your hard drive and insert it just below the floppy drive, making sure
that the IDE connections are facing inward to the system. Take 4 screws from
the plate and screw it in tight ( use two each side). Below is a picture of
a hard drive.
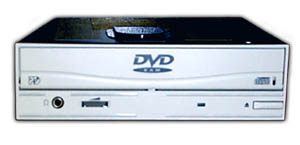
The DVD/CD-Drive : For
this we will assume we are working with DVD. Remove the DVD drive from it's
packaging. (DVD drive pictured below). Now check the drive is jumpered to
master settings. ( You can usually see how to do this from a sticker on the
drive, else refer to any documentation that came with the drive).
You will now see on the the
front of the computer a few panels exactly the right size for your DVD
drive. You select the uppermost one ( Usually at the top when tower is
upright). Behind this there will be a cage which the DVD drive will happily
slip into. But before you do this check for a metal plate blocking
it's exit point. Remove this plate using your hand or pliers by simply
twisting it back and forth ( Remember you are using the uppermost one). Now
remove the Plastic Blanking plate at the front of the system.
Making sure the eject button
will be to the bottom right (when system is upright) insert the DVD drive
from the front and using 4 screws (from your plate), screw the DVD
drive in tight ( use two each side).
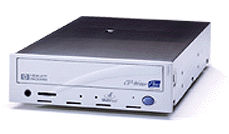
The CDRW/DVDRW Drive : Remove
the CDRW drive from it's packaging. (CDRW drive pictured below). Now check
the drive is jumpered to Slave settings. (You can usually see how to do this
from a sticker on the drive, else refer to any documentation that came with
the drive).
You will now see on the the
front of the computer a few panels exactly the right size for your CDRW
drive. You select the the one below the DVD/CD-Drive. Behind this there will
be a cage which the CDRW drive will happily slip into. But before you do
this check for a metal plate blocking it's exit point. Remove this
plate using your hand or pliers by simply twisting it back and forth (
Remember you are using the uppermost one). Now remove the Plastic Blanking
plate at the front of the system.
Making sure the eject button
will be to the bottom right (when system is upright) insert the CDRW drive
from the front and using 4 screws (from your plate), screw the CDRW
drive in tight ( use two each side).
Click
here for Build your own computer step by step tutorial Part 6
Privacy
policy Link
Exchange Links
page Contact Info
By
using this website you are agreeing to this Disclaimer & Legal statement
|